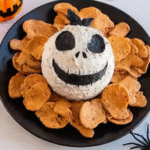
How to Make a Spooky Skellington Cheese Ball for Halloween Parties

This Skellington Cheese Ball transforms any ordinary gathering into a Halloween spectacular that’ll have your guests screaming for more! Last Halloween, I watched my neighbor Sarah’s party go from lukewarm to legendary when she unveiled her bone-chilling cheese creation shaped like Jack Skellington’s grinning skull.
The moment guests spotted this eerie appetizer on her buffet table, cameras started flashing and the crowd gathered around like moths to a flame.
What started as a simple cheese ball recipe has become my go-to showstopper for October entertaining. This isn’t just another party appetizer – it’s an edible conversation piece that combines the creamy comfort of classic cheese balls with the theatrical flair Halloween deserves.
Why You’ll Love This Recipe
Picture this: you’re hosting a Halloween party, and while everyone else brings store-bought candy and generic decorations, you unveil a masterpiece that looks like it escaped from Tim Burton’s kitchen. That’s exactly what happened when I first made this skeletal sensation for my office Halloween potluck. My coworkers couldn’t believe I’d crafted something so impressive in under 30 minutes!
The beauty of this recipe lies in its versatility and simplicity. Whether you’re a seasoned party host or someone who typically sticks to ordering pizza, this cheese ball empowers you to create something genuinely memorable.
Plus, with three flavor variations, you can customize it to match your crowd’s taste preferences – spicy for the thrill-seekers, herby for the sophisticated palates, or sweet for those who love unexpected flavor combinations.
Discover more crowd-pleasing party recipes here to complete your Halloween spread!

Ingredients List
| Base Cheese Ball | Quantity |
|---|---|
| Cream cheese | 2 cups |
| Shredded cheddar | 1 cup |
| Crushed walnuts | 1/2 cup |
| Flavor Twists | Quantity | Theme |
|---|---|---|
| Chili powder | 1 teaspoon | Spicy |
| Chopped dill | 1 tablespoon | Herb Lovers |
| Honey | 2 tablespoons | Sweet |
The magic happens when you combine these simple pantry staples into something that looks professionally crafted. Each flavor twist creates a completely different personality for your Skellington creation – choose the one that speaks to your Halloween spirit!
Find more quick & easy recipes here for effortless entertaining solutions.
Step-by-Step Directions
Creating your Skellington Cheese Ball masterpiece is surprisingly straightforward once you break it down into manageable steps. I’ve refined this process through countless Halloween parties, and these techniques guarantee professional-looking results every time.
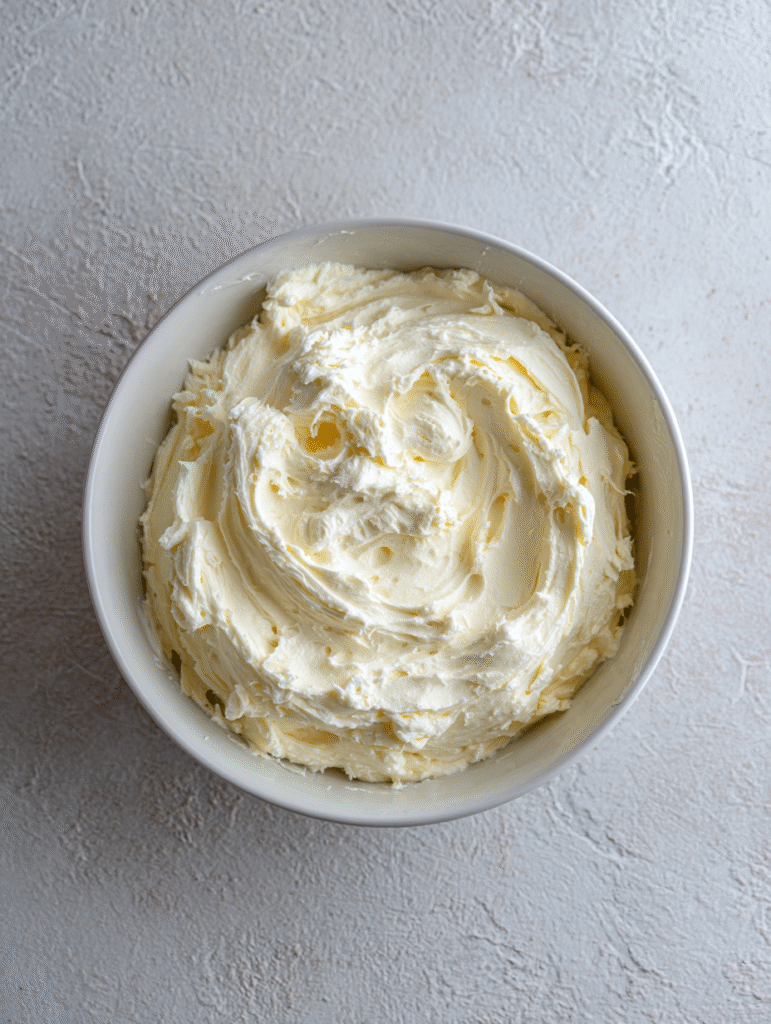
Step 1: Prepare Your Base
Remove cream cheese from refrigerator 30 minutes before starting – this softening step is crucial for smooth mixing. In a large bowl, combine softened cream cheese, shredded cheddar, and your chosen flavor twist using a wooden spoon or electric mixer until completely smooth.
Step 2: Shape the Skull
Using clean hands, form the mixture into an oval shape for the skull base. Create two smaller indentations where the eye sockets will be, and gently pinch the bottom to form a slight jaw structure. Don’t worry about perfection – the rustic look adds character!
Step 3: Add the Coating
Roll your shaped cheese ball in crushed walnuts, pressing gently to ensure they adhere. For extra skeletal effect, leave some areas less coated to create natural bone-like variations in texture and color.
Step 4: Create Facial Features
Use black olives or peppercorns for eye sockets, and carefully slice thin pieces of dark cheese or use herb strips to create the iconic stitched mouth. Small pretzel sticks can serve as bone accents around the edges.
Exact Timing to make Skellington Cheese Ball
- Prep time: 20 minutes (including cream cheese softening)
- Assembly time: 10 minutes
- Chilling time: 2 hours minimum
- Total time: 2 hours 30 minutes
Pro tip: Make your Skellington Cheese Ball the night before your party. The flavors meld beautifully overnight, and you’ll have one less task on party day!
Nutritional Information
Understanding the nutritional profile of your Skellington Cheese Ball helps you make informed decisions about portion sizes and party planning. Here’s the complete breakdown per serving (assuming 8 servings total):
| Nutrient | Per Serving | % Daily Value |
|---|---|---|
| Calories | 285 | 14% |
| Total Fat | 26g | 33% |
| Saturated Fat | 14g | 70% |
| Cholesterol | 75mg | 25% |
| Sodium | 420mg | 18% |
| Total Carbohydrates | 4g | 1% |
| Protein | 12g | 24% |
| Calcium | 195mg | 15% |
| Vitamin A | 850 IU | 17% |
According to USDA nutritional data, cream cheese provides significant amounts of vitamin A and calcium, while the walnuts contribute healthy omega-3 fatty acids and vitamin E. The high protein content makes this appetizer more satisfying than typical party snacks, helping guests feel fuller longer.
Healthier Alternatives
Transform your Skellington Cheese Ball into a more nutritious option without sacrificing the spooky appeal that makes it a party favorite. These modifications maintain the essential flavors while boosting nutritional benefits:
| Original Ingredient | Healthier Alternative | Benefit |
|---|---|---|
| Full-fat cream cheese | Greek yogurt cream cheese blend (50/50) | Reduces calories by 40%, adds probiotics |
| Regular cheddar cheese | Sharp cheddar (reduced quantity) | Same flavor intensity with 25% less cheese |
| Crushed walnuts | Mixed nuts (almonds, pecans, walnuts) | Diverse nutrient profile, more antioxidants |
| Honey (sweet version) | Pure maple syrup | Lower glycemic index, trace minerals |
| Regular herbs | Fresh herbs + nutritional yeast | B-vitamins, enhanced umami flavor |
For dietary restrictions, consider these adaptations: vegan versions using cashew cream and nutritional yeast, dairy-free options with plant-based cream cheese alternatives, or keto-friendly versions that increase the nut content while reducing any sweet additions.
Explore more healthy dessert recipes here to round out your nutritious Halloween spread!
Serving Suggestions
Create a Themed Presentation: Position your Skellington Cheese Ball as the centerpiece on a black serving platter surrounded by orange and black crackers, pretzel bones, and dark bread rounds. Add dry ice for dramatic smoking effect (ensure food safety by keeping dry ice separate from food). Garnish the platter with plastic spiders and autumn leaves for an Instagram-worthy display.
Pair with Complementary Flavors: Serve alongside tart apple slices, which cut through the richness while adding seasonal appeal. Provide an assortment of crackers including water crackers, pumpernickel rounds, and Halloween-colored tortilla chips. The contrast between the creamy cheese ball and crisp accompaniments creates perfect textural balance.
Portion Control Strategy: Offer small individual plates and cheese spreaders to encourage proper portions while maintaining the interactive, social aspect of shared appetizers. Position the serving station away from other heavy appetizers to let your spooky creation shine as the star attraction.
Common Mistakes to Avoid
Using Cold Cream Cheese: The biggest mistake I see home cooks make is attempting to mix cold cream cheese directly from the refrigerator. This creates lumpy, difficult-to-shape mixtures that never achieve the smooth consistency needed for proper molding. Always allow cream cheese to reach room temperature – about 30 minutes on the counter – before beginning your Skellington Cheese Ball assembly.
Over-handling the Mixture: Excessive mixing or reshaping can cause the cheese ball to become oily and lose its firm structure. Mix ingredients just until combined, shape once decisively, and resist the urge to constantly adjust. The mixture continues to firm up during chilling, so what seems slightly soft initially will achieve perfect consistency after refrigeration.
Skipping the Chilling Time: Rushing to serve your creation before it’s properly chilled results in a cheese ball that doesn’t hold its skeletal shape and becomes messy when guests attempt to spread it. Plan ahead and allow minimum 2 hours chilling time, though overnight is even better for both texture and flavor development.
Storing Tips
Refrigerator Storage: Wrap your completed Skellington Cheese Ball tightly in plastic wrap, ensuring no air pockets remain that could cause drying or absorption of other refrigerator odors. Store for up to 4 days in the refrigerator, though the texture and appearance are best within the first 2 days. Always remove from refrigerator 15 minutes before serving to achieve optimal spreading consistency.
Make-Ahead Strategy: Prepare the cheese mixture up to 3 days in advance, but add decorative elements like olive “eyes” and herb “stitches” just before serving to maintain their fresh appearance. Store the shaped but undecorated cheese ball wrapped in parchment paper, then plastic wrap for best results.
Freezing Guidelines: While not ideal for texture, you can freeze the basic cheese mixture (without nuts or decorative elements) for up to 1 month. Thaw completely in refrigerator overnight, re-shape if necessary, add fresh coating and decorations before serving. Note that previously frozen cheese balls may have slightly grainier texture but retain full flavor.
FAQs
How far in advance can I make my Skellington Cheese Ball?
You can prepare your Skellington Cheese Ball up to 2 days before your party for optimal results. Make the base mixture and shape it up to 3 days ahead, but add final decorative touches like olive eyes and herb details on the day of serving to ensure they look fresh and vibrant. The flavors actually improve after overnight chilling, making advance preparation beneficial for both convenience and taste.
What’s the best way to achieve the perfect skull shape for my Skellington Cheese Ball?
Start with slightly more mixture than you think you need, then use clean, slightly damp hands to mold your Skellington Cheese Ball into an oval base. Create gentle indentations for eye sockets using your thumbs, and use a knife or spoon handle to create the jaw line. Don’t aim for perfection – the slightly irregular, handcrafted look adds to the spooky charm and appears more authentically bone-like.
Can I make a dairy-free version of the Skellington Cheese Ball?
Absolutely! Create a dairy-free Skellington Cheese Ball using cashew-based cream cheese alternatives and nutritional yeast for cheesy flavor. Blend soaked cashews with lemon juice, garlic powder, and herbs for a homemade base, or use store-bought vegan cream cheese brands. The texture may be slightly different, but the spooky appearance and delicious taste remain intact.
Why is my Skellington Cheese Ball too soft to hold its shape?
A soft Skellington Cheese Ball usually indicates insufficient chilling time or cream cheese that wasn’t properly drained. Ensure your cream cheese isn’t the whipped variety (which contains more air and water), and always chill for at least 2 hours. If it’s still too soft, gently mix in an additional 2-3 tablespoons of shredded cheese to firm up the mixture, then chill for another hour before serving.
Skellington Cheese Ball
- Total Time: 2 hours 30 minutes
- Yield: 1 large cheese ball (serves 10-12) 1x
Description
Turn your Halloween table into a show-stopping centerpiece with this Spooky Skellington Cheese Ball. This fun and creepy party appetizer mixes creamy cheeses, crushed walnuts, and your favorite flavor twist for a bite that’s as delicious as it is eye-catching. Perfect for recipes appetizer, recipes for parties, and recipes quick ideas that wow guests without stress.
Ingredients
- 2 cups cream cheese, softened
- 1 cup shredded cheddar cheese
- 1/2 cup crushed walnuts
- 1 teaspoon chili powder (spicy variation)
- 1 tablespoon chopped dill (herb variation)
- 2 tablespoons honey (sweet variation)
- Black olives or peppercorns (for eyes)
- Thin dark cheese slices or herb strips (for mouth)
- Pretzel sticks (optional bone accents)
Instructions
- Remove cream cheese from refrigerator 30 minutes before mixing to soften.
- In a large bowl, combine softened cream cheese, shredded cheddar, and your chosen flavor twist. Mix until smooth using a wooden spoon or electric mixer.
- Shape the mixture into an oval to form the skull. Use fingers to create eye sockets and a slight jawline.
- Roll the shaped cheese ball in crushed walnuts, pressing gently to coat evenly. Leave some spots uncovered for a bone-like effect.
- Use black olives or peppercorns for eyes, and thin dark cheese slices or herbs to create a stitched mouth design.
- Optional: Add pretzel sticks as bone decorations around the edges.
- Cover and chill for at least 2 hours before serving.
- Serve with crackers or vegetable sticks for dipping.
Notes
Make the cheese ball a day ahead to let the flavors develop and save prep time on party day. Keep refrigerated until ready to serve for the best texture and presentation.
- Prep Time: 20 minutes
- Cook Time: 0 minutes
- Category: Appetizer
- Method: No Cook
- Cuisine: American
Nutrition
- Serving Size: 2 tablespoons
- Calories: 180
- Sugar: 2g
- Sodium: 200mg
- Fat: 16g
- Saturated Fat: 7g
- Unsaturated Fat: 8g
- Trans Fat: 0g
- Carbohydrates: 3g
- Fiber: 0g
- Protein: 6g
- Cholesterol: 30mg
Keywords: cheese ball, halloween recipe, party appetizer, spooky snack, recipes appetizer