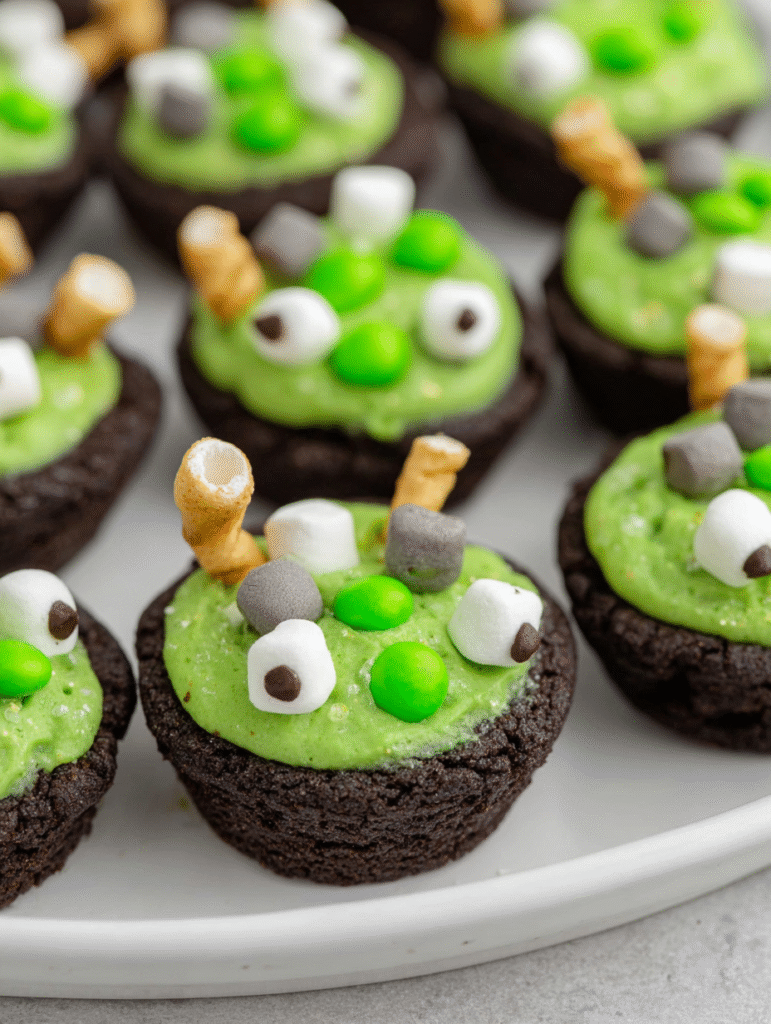
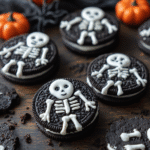
Easy Skeleton Oreos Halloween Recipe: Spooky Treats in 15 Minutes
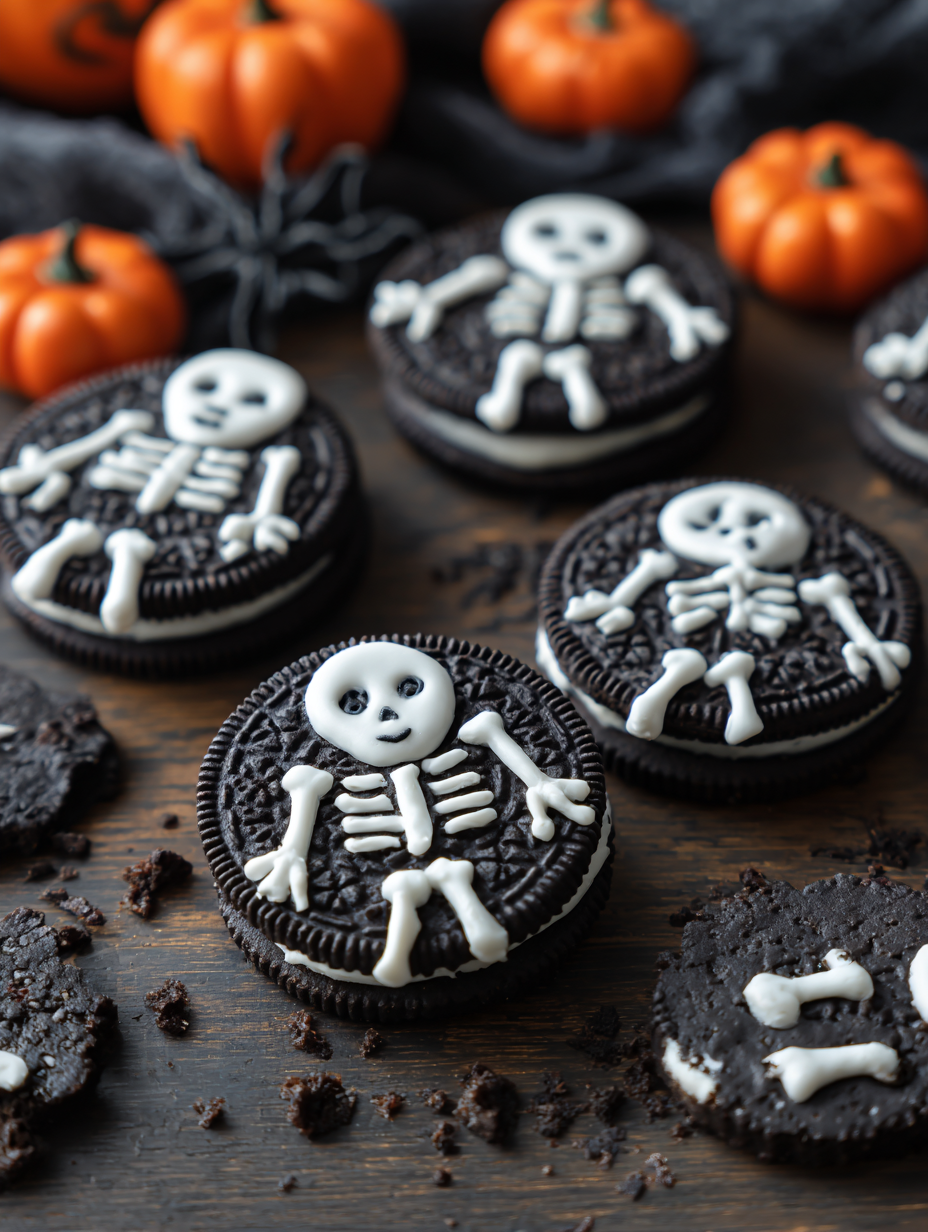
Skeleton Oreos Halloween treats are the perfect last-minute solution when you need spooky snacks that’ll make everyone scream with delight! Picture this: it’s October 30th, and you suddenly remember you promised to bring Halloween treats to the office party tomorrow.
Instead of panicking, you can whip up these adorable skeleton cookies using just five simple ingredients you probably already have at home. These creepy-cute Oreos transform ordinary cookies into bone-chilling masterpieces that look like they took hours to create, but secretly require only 15 minutes of your time.
Why You’ll Love This Recipe
Last Halloween, my neighbor knocked on my door in a frenzy – her daughter’s class party was the next morning, and she’d completely forgotten about the treat assignment. Together, we created two dozen skeleton Oreos in under 20 minutes, and they became the hit of the party! The kids were amazed by the “scary bones” poking out of the cookies, and the teachers couldn’t believe how professional they looked.
What makes this recipe absolutely magical is its simplicity combined with maximum visual impact. You’re essentially giving regular Oreos a Halloween makeover using basic icing and straws as “bones.” The best part? Even if your artistic skills peaked in kindergarten, these will still look fantastic because imperfection adds to their spooky charm. Explore more quick & easy recipes here for additional party-saving ideas!

Ingredients List
Here’s everything you need to create your spine-tingling skeleton treats:
| Ingredient | Quantity | Notes |
|---|---|---|
| Oreos | 10 pieces (roughly 1 pack) | Regular chocolate Oreos work best |
| Icing sugar | 50-80 g | For creating the white “bone” icing |
| Cold water | 1-2 tsp | To mix with icing sugar |
| Black icing writing pen | 1 piece | For drawing skeleton faces |
| Straws | 2 pieces | Cut down the middle to create bone shapes |
The beauty of this recipe lies in its accessibility – most families already have these items in their pantry or can grab them during a quick grocery run. Find more simple weeknight recipes here that use everyday ingredients for extraordinary results!
Step-by-Step Directions
Start by gathering all your ingredients and setting up a clean workspace. Remove the Oreos from their packaging and arrange them on a parchment-lined baking sheet or serving tray, leaving space between each cookie for decorating.
Step 1: Create the Bone Icing
Mix the icing sugar with cold water gradually, starting with 1 teaspoon and adding more if needed. Stir until you achieve a thick but pipeable consistency – it should hold its shape when piped but still flow smoothly from your spoon or piping bag.
Step 2: Prepare Your Bone Shapes
Cut the straws lengthwise to create thin strips that resemble bone fragments. Each straw should yield 4-6 usable pieces. Set these aside for later decoration.
Step 3: Apply the Base Skeleton Design
Using a spoon or piping bag, carefully pipe white icing onto each Oreo to create the basic skeleton structure. Start with a vertical line down the center for the spine, then add horizontal lines for ribs and simple shapes for arms and legs.
Step 4: Add Bone Details
While the icing is still wet, gently press the straw pieces into the icing to create protruding “bones” – place them at joints like elbows, knees, and shoulders for maximum spooky effect.
Step 5: Draw the Face
Once the white icing has set slightly (about 2-3 minutes), use your black icing pen to draw simple skeleton faces – two dots for eyes and a small curved line for the mouth work perfectly.
Exact Timing to Make Skeleton Oreos Halloween
- Prep time: 5 minutes (gathering ingredients and setting up workspace)
- Decorating time: 8-10 minutes (piping icing and adding details)
- Setting time: 2-3 minutes (allowing icing to firm up between steps)
- Total time: 15 minutes from start to finish
The beauty of this timing is that you can easily double or triple the batch without significantly increasing the total time – most of the work happens in assembly-line fashion once you get into a rhythm.
Nutritional Information
Here’s a comprehensive breakdown of the nutritional content per serving (1 decorated Oreo):
| Nutrient | Amount per Serving | % Daily Value* | Notes |
|---|---|---|---|
| Calories | 75-80 | 4% | Primarily from Oreo cookie base |
| Total Fat | 3.2g | 4% | Mainly from cookie’s vegetable oils |
| Saturated Fat | 1.1g | 6% | From cookie filling and cocoa |
| Trans Fat | 0g | 0% | Oreos are trans-fat free |
| Cholesterol | 0mg | 0% | Vegan-friendly cookie base |
| Sodium | 70mg | 3% | From cookie processing |
| Total Carbohydrates | 12g | 4% | Cookie and added icing sugar |
| Dietary Fiber | 0.7g | 3% | From cocoa and wheat flour |
| Total Sugars | 6.5g | – | Cookie filling plus icing addition |
| Added Sugars | 3g | 6% | From decorative icing |
| Protein | 0.8g | 2% | Minimal from wheat flour |
| Vitamin C | 0mg | 0% | Not a significant source |
| Calcium | 10mg | 1% | Trace amounts from processing |
| Iron | 0.4mg | 2% | From enriched flour |
*Based on a 2,000 calorie daily diet. These treats are best enjoyed as occasional indulgences rather than regular snacks due to their sugar content. Discover more balanced dessert options here for everyday sweet cravings!
Healthier Alternatives
Transform your treats into more nutritionally conscious options while maintaining the spooky fun factor:
| Original Ingredient | Healthier Swap | Benefits | Taste Impact |
|---|---|---|---|
| Regular Oreos | Organic chocolate sandwich cookies | No artificial preservatives, organic ingredients | Slightly richer chocolate flavor |
| White icing sugar | Greek yogurt + powdered stevia | Added protein, reduced sugar | Tangier taste, still creamy |
| Plastic straws | Pretzel sticks (broken) | Edible option, adds crunch | Salty-sweet combination |
| Black icing pen | Dark chocolate chips (melted) | Antioxidants from cocoa | Richer chocolate taste |
| Regular cookies | Gluten-free sandwich cookies | Suitable for gluten sensitivities | Similar taste and texture |
These modifications allow you to create Skeleton Oreos Halloween treats that accommodate various dietary needs without sacrificing the visual appeal. The pretzel stick swap is particularly clever – kids love the extra crunch, and parents appreciate the reduced plastic waste.
For those managing diabetes or sugar intake, consider using sugar-free sandwich cookies as your base and natural fruit purees mixed with a small amount of cornstarch for your “icing” – pureed banana or applesauce work surprisingly well and add beneficial nutrients.
Serving Suggestions
Create a Spooky Display Platter
Arrange your Skeleton Oreos Halloween treats on a black serving tray surrounded by plastic spiders, fake cobwebs, or scattered candy corn. The contrast makes the white “bones” pop dramatically, and the theatrical presentation turns a simple snack into a conversation starter. Consider placing them at varying heights using small boxes covered with black cloth for a graveyard effect.
Pair with Themed Beverages
Serve alongside “witch’s brew” (dark grape juice or blackberry lemonade) or “ghost milk” (regular milk in clear glasses with whipped cream “ghosts” floating on top). The combination creates a complete spooky snack experience that both kids and adults will remember.
Interactive Decorating Station
Set up an area where guests can customize their own skeleton cookies with extra icing colors, edible glitter, or mini candy pieces. This works especially well for children’s parties and turns the treats from a simple snack into an engaging activity that doubles as party entertainment.
Common Mistakes to Avoid
Using Icing That’s Too Thin
The most frequent error is making the white icing too watery, which causes it to run off the cookies instead of holding its bone-like shape. Always start with less liquid and add gradually – your icing should be thick enough to hold peaks but smooth enough to pipe easily. If you accidentally make it too thin, simply add more powdered sugar rather than starting over.
Adding Face Details Too Early
Many people rush to draw the skeleton faces before the white icing has had time to set properly. This causes the black icing to bleed into the white, creating muddy colors instead of crisp contrast. Wait at least 2-3 minutes after applying the white icing before adding facial features, and your Skeleton Oreos Halloween treats will look professionally crafted.
Overcrowding the Design
Less is definitely more when it comes to skeleton decoration. Trying to add too many bone details or facial features makes the cookies look cluttered rather than spooky. Stick to simple spine, rib, and limb outlines with minimal facial features – sometimes just two eye dots are more effective than elaborate skull designs.
Storing Tips
Short-Term Storage (1-2 Days)
Keep your decorated Skeleton Oreos Halloween treats in an airtight container at room temperature, placing parchment paper between layers to prevent the icing from sticking together. They’ll maintain their crisp texture and vibrant decoration for up to 48 hours, making them perfect for preparing the night before a party or event.
Longer Storage (Up to 1 Week)
For extended storage, place the completely set cookies in the refrigerator in a sealed container. The cool temperature helps preserve both the cookie’s crispness and the icing’s integrity. Remove them 10-15 minutes before serving to allow them to return to room temperature for the best taste and texture experience.
Avoid Moisture Exposure
Never store these treats in humid environments or uncovered containers, as moisture will cause the icing to become sticky and the cookies to lose their crunch. If you live in a particularly humid climate, consider adding a small packet of food-safe desiccant to your storage container to maintain optimal freshness.
FAQs
Can I make Skeleton Oreos Halloween treats ahead of time for a party?
Absolutely! These treats actually benefit from being made 4-6 hours in advance, as this allows the icing to set completely and makes them easier to handle and serve. Store them in an airtight container at room temperature, and they’ll maintain their spooky appearance and delicious taste for up to two days. Just avoid refrigerating them unless necessary, as condensation can affect the icing’s appearance.
Don’t panic if your skeleton design doesn’t turn out perfectly – imperfections often add to the spooky charm! For wet icing mistakes, use a clean toothpick to gently reshape the design before it sets. If the icing has already hardened, you can carefully scrape off small areas with a knife and re-pipe. Remember, real skeletons aren’t perfectly symmetrical either, so embrace the creepy character!
Are Skeleton Oreos Halloween treats suitable for people with food allergies?
Standard Oreos contain wheat, soy, and may contain milk, so they’re not suitable for those with gluten sensitivity or severe dairy allergies. However, you can easily substitute gluten-free sandwich cookies or dairy-free alternatives available in most grocery stores. Always check ingredient labels carefully, and consider making a separate batch with allergen-free ingredients if you’re serving guests with specific dietary restrictions.
How can I make my Skeleton Oreos Halloween treats look more professional?
The secret to professional-looking results lies in three key techniques: use a piping bag or squeeze bottle for more precise icing application, allow each layer to set before adding details, and keep your design simple but bold. Practice your skeleton outline on a piece of parchment paper first, and don’t forget that slight imperfections actually make them look more authentically spooky rather than overly perfect!
Skeleton Oreos Halloween Recipe
- Total Time: 15 minutes
- Yield: 10 cookies 1x
Description
These Easy Skeleton Oreos are spooky, simple, and ready in just 15 minutes. With a few pantry staples and a touch of creativity, you can turn classic Oreos into Halloween-perfect skeleton treats. Perfect for recipes quick, recipes for kids, and recipes dessert.
Ingredients
- 10 Oreos (regular chocolate flavor)
- 50–80 g icing sugar
- 1–2 tsp cold water
- 1 black icing writing pen
- 2 straws (cut into thin bone-like strips)
Instructions
- Arrange Oreos on a parchment-lined tray or flat surface for decorating.
- In a small bowl, mix icing sugar with cold water, starting with 1 teaspoon and adding more as needed. Stir until smooth and thick but pipeable.
- Cut straws lengthwise to create small bone-shaped strips and set aside.
- Pipe white icing onto each Oreo to create a skeleton design. Start with a vertical line for the spine, then add horizontal rib lines and small shapes for arms and legs.
- While icing is still wet, press straw strips into joints like elbows or knees to mimic bones.
- Once icing begins to set (about 2–3 minutes), use the black icing pen to draw skeleton faces with eyes and a mouth.
- Let the cookies set for a few minutes before serving or packaging.
Notes
These quick and spooky skeleton Oreos are perfect for Halloween parties or last-minute gatherings. Even imperfect designs look adorable and festive. Store in an airtight container at room temperature for up to three days.
- Prep Time: 5 minutes
- Cook Time: 0 minutes
- Category: Dessert
- Method: No Bake
- Cuisine: American
Nutrition
- Serving Size: 1 cookie
- Calories: 110
- Sugar: 11g
- Sodium: 70mg
- Fat: 5g
- Saturated Fat: 2g
- Unsaturated Fat: 2g
- Trans Fat: 0g
- Carbohydrates: 15g
- Fiber: 1g
- Protein: 1g
- Cholesterol: 0mg
Keywords: Halloween dessert, skeleton Oreos, recipes quick, recipes for kids, recipes dessert