Irresistible Butterfinger Balls Recipe – Easy No-Bake Candy Treats for Chocolate Lovers
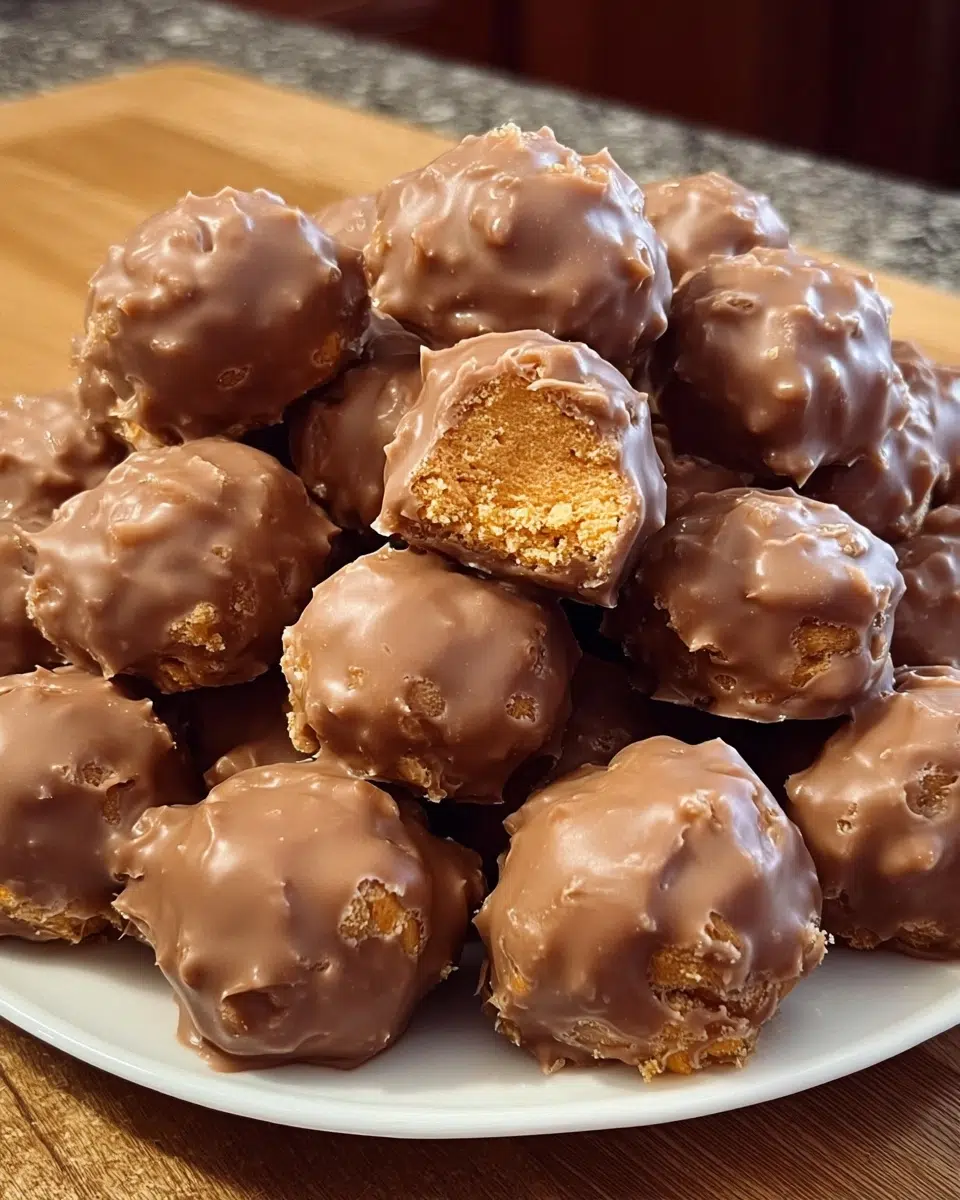
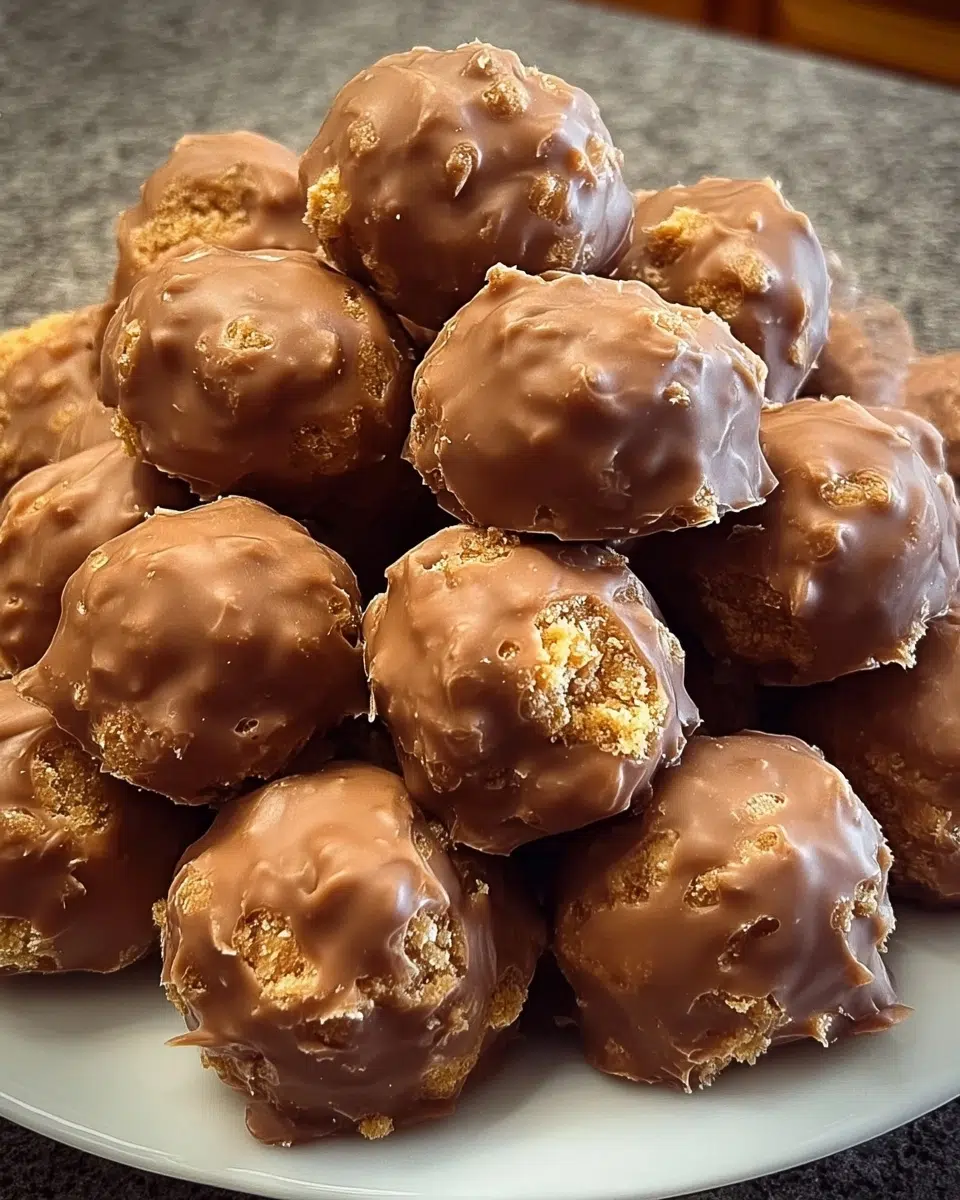
Butterfinger balls are the ultimate crowd-pleasing dessert that transforms everyone’s favorite crunchy candy bar into irresistible bite-sized treats. Last Christmas, I was scrambling for a last-minute dessert when I spotted leftover Halloween Butterfinger bars in my pantry.
What started as a desperate attempt to create something impressive quickly became the most requested recipe at every family gathering. These no bake Butterfinger balls combine the perfect balance of creamy peanut butter, sweet powdered sugar, and that iconic Butterfinger crunch we all crave.
The magic happens when you roll these homemade candy balls in your hands, watching simple pantry staples transform into bakery-worthy confections. No oven required, no complicated techniques – just pure nostalgic flavors wrapped in chocolate perfection.
Why You’ll Love This Recipe
This butterfinger balls recipe has saved me countless times when unexpected guests arrive or when I need to contribute to potluck dinners. The beauty lies in its simplicity – you probably have most ingredients sitting in your kitchen right now. My neighbor’s teenage son, who claims he doesn’t like homemade desserts, secretly asked me for the recipe after devouring half a batch during a backyard barbecue.
These easy Butterfinger balls require zero baking skills but deliver maximum wow factor. Whether you’re preparing holiday Butterfinger sweets or need peanut butter no bake treats for a school fundraiser, this Butterfinger dessert recipe consistently delivers professional-looking results. Explore more quick & easy dinner recipes here to complete your meal planning.
Ingredients List
| Ingredient | Amount | Notes |
|---|---|---|
| Peanut butter | 1 cup | Avoid all-natural varieties |
| Powdered sugar | 1 cup | For sweetness and binding |
| Softened butter | 4 tablespoons (½ stick) | Room temperature works best |
| Graham cracker crumbs | ¾ cup | Store-bought or homemade |
| Vanilla extract | 1 teaspoon | Pure vanilla preferred |
| Crushed Butterfinger bars | ½ cup | Save some for garnish |
| Chocolate bark or chocolate chips | 8 ounces | For coating |
| Optional garnishes: | ||
| Additional crushed Butterfinger bars | As needed | For topping |
| Festive sprinkles | As desired | Holiday-themed work great |
| Coarse sea salt | Pinch | For gourmet touch |
Find more delicious lunch ideas here to keep your menu planning exciting and varied.
Step-by-Step Directions
Prepare your workspace by lining a baking sheet with parchment paper and gathering all ingredients at room temperature. Crush Butterfinger bars in a sealed plastic bag using a rolling pin until you achieve small, chunky pieces.
Mix the base by combining peanut butter, softened butter, and vanilla extract in a large mixing bowl. Beat until smooth and creamy, approximately 2-3 minutes with an electric mixer.
Add dry ingredients by gradually incorporating powdered sugar and graham cracker crumbs. Mix until a cohesive dough forms that holds together when pressed.
Fold in Butterfinger pieces gently, reserving some crushed candy for garnishing later. The mixture should be firm enough to roll but not dry.
Shape the balls by scooping tablespoon-sized portions and rolling between your palms into smooth, uniform spheres. Place on prepared baking sheet.
Chill the shaped balls in the refrigerator for 30 minutes to firm up before coating.
Melt chocolate using a double boiler or microwave in 30-second intervals, stirring between each interval until smooth.
Dip each ball into melted chocolate using a fork or dipping tool, allowing excess chocolate to drip off. Return to parchment-lined sheet.
Add garnishes while chocolate is still wet – sprinkle with reserved crushed Butterfinger pieces, festive sprinkles, or a pinch of sea salt.
Final chill in refrigerator for 15-20 minutes until chocolate coating sets completely.

Exact Timing to make Butterfinger Balls
The total preparation time for these delightful Butterfinger balls spans approximately 45-60 minutes, with most of that being hands-off chilling time. Active preparation takes only 20 minutes – 5 minutes for crushing candy bars and gathering ingredients, 10 minutes for mixing and shaping, and 5 minutes for chocolate coating. The first chill requires 30 minutes to firm the shaped balls, while the final chocolate setting takes just 15-20 minutes. This timing makes it perfect for preparing ahead of parties or when you need a quick dessert solution.
Nutritional Information
| Nutrient | Per Ball (1 piece) | % Daily Value |
|---|---|---|
| Calories | 185 | 9% |
| Total Fat | 11g | 14% |
| Saturated Fat | 5g | 25% |
| Cholesterol | 8mg | 3% |
| Sodium | 95mg | 4% |
| Total Carbohydrates | 18g | 7% |
| Dietary Fiber | 1g | 4% |
| Total Sugars | 15g | – |
| Protein | 4g | 8% |
| Vitamin E | 1.2mg | 8% |
| Niacin | 2.1mg | 13% |
Based on a recipe yielding 24 balls. Nutritional data sourced from USDA Food Composition Database. Peanut butter provides heart-healthy monounsaturated fats and plant-based protein, while the chocolate coating contributes antioxidants from cocoa.
Healthier Alternatives
| Original Ingredient | Healthier Alternative | Benefit |
|---|---|---|
| Regular peanut butter | Natural almond or cashew butter | Lower sodium, more vitamin E |
| Powdered sugar | Powdered erythritol or monk fruit sweetener | Reduces calories by 60%, keto-friendly |
| Butter | Coconut oil or Greek yogurt cream cheese | Adds probiotics, reduces saturated fat |
| Graham crackers | Crushed almonds or oat flour | Gluten-free option, more fiber |
| Milk chocolate coating | Dark chocolate (70% cacao) or sugar-free chocolate | Higher antioxidants, less sugar |
| Butterfinger bars | Homemade crunchy peanut butter toffee bits | Control ingredients, no preservatives |
These modifications allow you to create Butterfinger Balls that accommodate various dietary restrictions while maintaining the beloved flavor profile. For diabetic-friendly versions, substitute all sweeteners with sugar-free alternatives. Vegan adaptations work beautifully using coconut oil and dairy-free chocolate. Explore more delicious Desserts here for additional healthy treat inspiration.
Serving Suggestions
Party Presentation: Arrange Butterfinger balls on tiered serving stands with doilies for elegant holiday gatherings or birthday parties. Create visual interest by alternating with other bite-sized treats like chocolate truffles or coconut balls. For themed events, coordinate garnish colors with your party palette – use red and green sprinkles for Christmas or pastel colors for spring celebrations.
Gift Packaging: These homemade Butterfinger balls make exceptional edible gifts when packaged in decorative tins or cellophane bags tied with ribbon. Include a handwritten recipe card for a personal touch that recipients always appreciate.
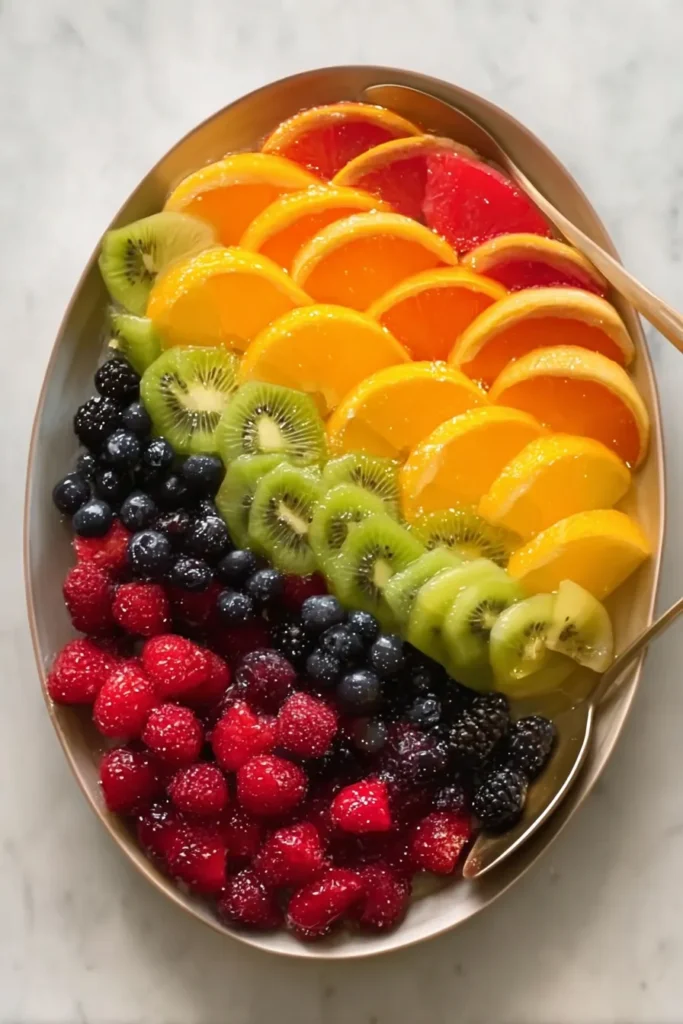
Dessert Pairings: Serve alongside vanilla ice cream for temperature contrast, or arrange on dessert charcuterie boards with fresh berries, nuts, and artisanal chocolates. They complement coffee, milk, or dessert wines beautifully for adult gatherings.
Common Mistakes to Avoid
Temperature Control Issues: The most frequent mistake involves working with ingredients at incorrect temperatures. If your butter is too cold, the mixture won’t bind properly, resulting in crumbly Butterfinger balls that fall apart during shaping. Conversely, ingredients that are too warm create sticky, unmanageable dough that won’t hold its shape.
Chocolate Coating Problems: Overheating chocolate leads to seizing, creating a grainy, unusable coating. Always melt chocolate gradually and ensure your chilled balls aren’t too cold when dipping, as extreme temperature differences can cause the chocolate to crack or develop white spots.
Crushing Inconsistency: Pulverizing Butterfinger bars too finely eliminates the signature crunch, while leaving pieces too large creates balls that crack when rolled. Aim for pea-sized chunks that distribute evenly throughout the mixture.
Storing Tips
Short-term Storage: Store finished Butterfinger balls in airtight containers in the refrigerator for up to one week. Layer between parchment paper to prevent sticking and maintain the chocolate coating’s appearance. Allow them to come to room temperature for 10-15 minutes before serving for optimal texture and flavor.
Freezer Storage: These treats freeze exceptionally well for up to three months when properly wrapped. Place in freezer-safe containers with tight-fitting lids, separating layers with parchment paper. Thaw overnight in the refrigerator, never at room temperature, to prevent condensation from affecting the chocolate coating.
Make-Ahead Strategy: Prepare the uncoated balls up to two days in advance, storing them covered in the refrigerator. Dip in chocolate the day of serving for the freshest appearance and best texture. This method works perfectly for holiday meal planning or party preparation.
FAQs
Can I make Butterfinger balls without chocolate coating?
Absolutely! Butterfinger balls are delicious without chocolate coating – simply roll the shaped balls in additional crushed Butterfinger pieces, coconut flakes, or chopped nuts for a different finish. This creates a lighter treat that showcases the peanut butter base more prominently.
How do I prevent my Butterfinger balls from being too soft or too hard?
The key to perfect Butterfinger balls lies in ingredient ratios and chilling time. If they’re too soft, add more powdered sugar or graham cracker crumbs gradually until the mixture holds together. If too hard, incorporate a tablespoon of softened butter or cream cheese to improve texture.
Can I substitute other candy bars in my Butterfinger balls recipe?
Yes! This versatile base works wonderfully with crushed Snickers, Heath bars, or Reese’s cups. Adjust sweetness accordingly – some candy bars are sweeter than Butterfingers, so you might need less powdered sugar in your Butterfinger balls mixture.
What’s the best way to crush Butterfinger bars for Butterfinger balls?
Place unwrapped Butterfinger bars in a sealed plastic bag and use a rolling pin or meat mallet to crush them into pea-sized pieces. Alternatively, pulse briefly in a food processor, but be careful not to create powder. Properly crushed pieces ensure the signature crunch in every bite of your Butterfinger balls.
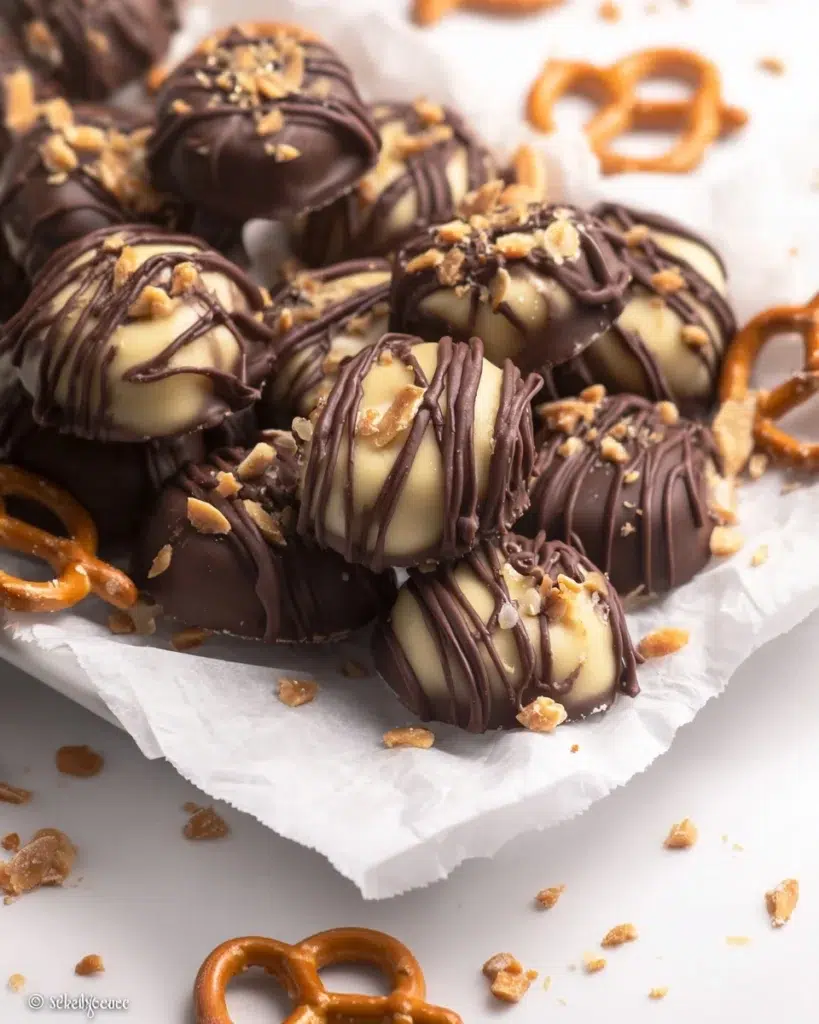
Chocolate Peanut Butter Pretzel Candies
- Total Time: 1 hour 15 minutes
- Yield: 24 candies 1x
Description
These Chocolate Peanut Butter Pretzel Candies are the ultimate no bake treat for sweet and salty lovers. With creamy peanut butter, crunchy pretzels, and smooth chocolate, this quick and easy dessert recipe is perfect for any occasion. Great for gifting or snacking, it’s a must try for anyone who loves recipes quick or recipes dessert ideas.
Ingredients
- 1 cup peanut butter (creamy or chunky)
- ½ cup powdered icing sugar
- 2 tablespoons cream or milk
- ⅔ cup pretzels, coarsely crushed
- ½ cup salted peanuts, chopped
- 1½ cups dark chocolate (about 150g)
- 1½ cups white chocolate (about 150g)
Instructions
- In a large bowl, mix peanut butter and powdered sugar until thick and moldable.
- Add cream or milk gradually until the mixture becomes smooth and workable.
- Fold in crushed pretzels and chopped peanuts evenly.
- Form the mixture into walnut sized balls and place them on a parchment lined baking sheet.
- Flatten the bottoms slightly and refrigerate for 30 minutes.
- Melt dark and white chocolate separately using a double boiler or microwave in 30 second intervals.
- Dip each chilled candy into melted chocolate, letting excess drip off.
- Place back on parchment and drizzle with contrasting chocolate for decoration.
- Allow to set for about 20 minutes before serving or storing.
Notes
These candies store well in an airtight container in the refrigerator for up to a week. Use high quality chocolate for the best flavor and texture.
- Prep Time: 25 minutes
- Cook Time: 0 minutes
- Category: Dessert
- Method: No Bake
- Cuisine: American
Nutrition
- Serving Size: 1 candy
- Calories: 130
- Sugar: 9g
- Sodium: 85mg
- Fat: 8g
- Saturated Fat: 3.5g
- Unsaturated Fat: 4.5g
- Trans Fat: 0g
- Carbohydrates: 11g
- Fiber: 1g
- Protein: 3g
- Cholesterol: 2mg
Keywords: recipes dessert, recipes quick, chocolate peanut butter, no bake candies, pretzel bites