How to Make Spooky Meringue Ghost Cookies That Will Haunt Your Taste Buds
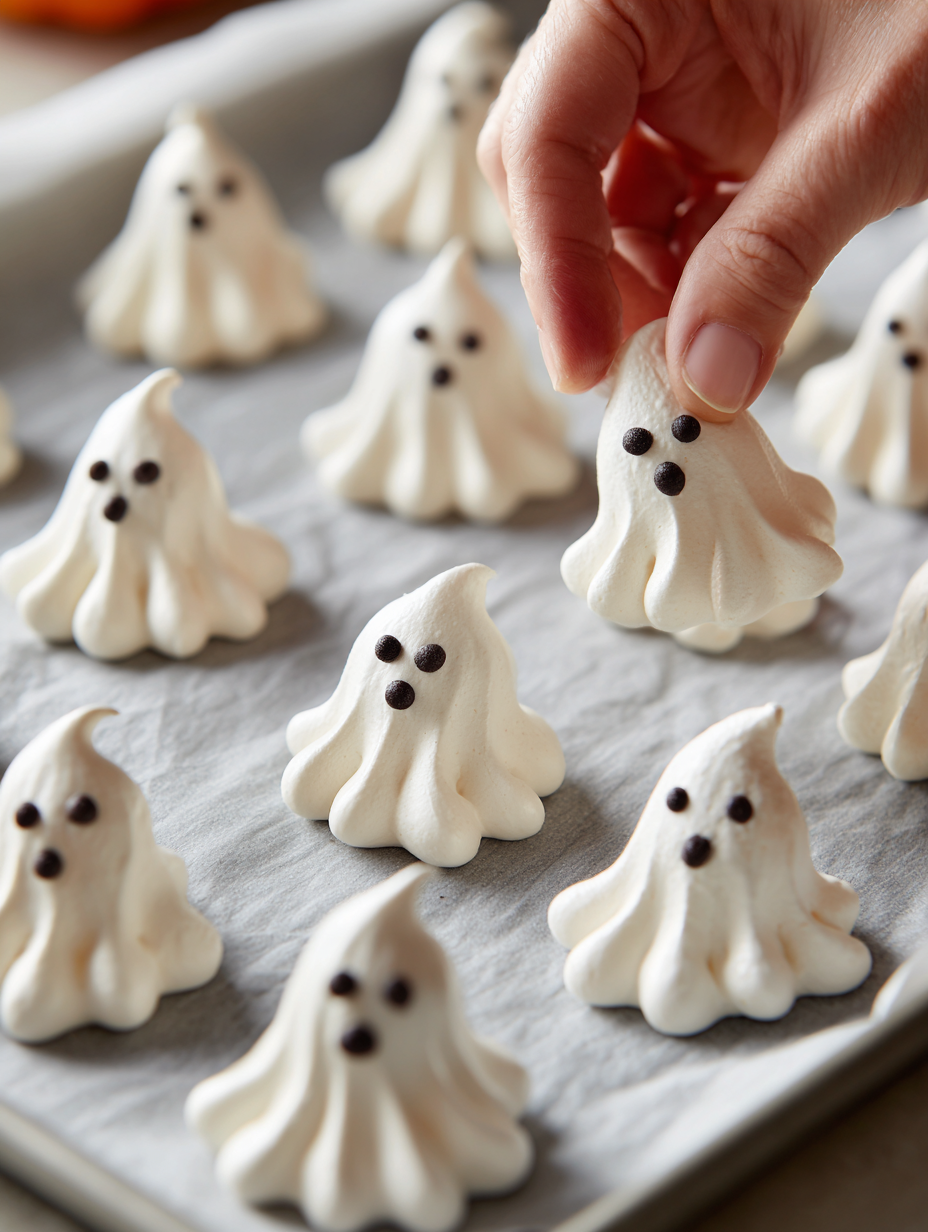
Meringue Ghost Cookies are the perfect spooky treat that transforms simple egg whites into adorable supernatural delights! Last Halloween, I discovered these ethereal cookies quite by accident when my regular sugar cookies failed spectacularly. With only a few basic ingredients left in my pantry, I decided to whip up something completely different.
What emerged from my oven were these delightfully ghostly meringues that looked like tiny spirits floating on my baking sheet. The kids squealed with delight, and even the adults couldn’t resist their melt-in-your-mouth sweetness.
These hauntingly beautiful treats require just four simple ingredients and minimal effort, making them ideal for busy parents or anyone wanting to create something magical without spending hours in the kitchen. The best part? They’re naturally gluten-free and have that perfect crispy-yet-chewy texture that makes meringues so irresistible.
Explore more trending seasonal treats here for additional inspiration that’ll make your Halloween spread absolutely spectacular.

Why You’ll Love This Recipe
I’ll never forget the first time my daughter helped me pipe these little ghosts. Her giggles filled the kitchen as we created wobbly, imperfect shapes that somehow looked even more charming than any professional version could. That’s the magic of meringue ghost cookies – they’re forgiving, fun, and absolutely foolproof.
What makes these cookies truly special is their versatility. They’re naturally dairy-free, making them perfect for guests with dietary restrictions, and they store beautifully in an airtight container for up to a week. Plus, the simple piping technique means even beginners can create impressive results that look like they came from a fancy bakery.
Ingredients List
Here’s everything you need to create these spooky meringue ghost cookies:
| Ingredient | Amount |
|---|---|
| Medium egg whites | 3 eggs |
| Sugar | 170g (3/4 cup) |
| Vanilla extract or vanilla sugar | 1 teaspoon (or 1 pack) |
| White vinegar or fresh lemon juice | 1/2 teaspoon (or a squeeze) |
The beauty of this recipe lies in its simplicity – just four pantry staples transform into something truly magical. Discover more quick weeknight desserts here that use similar basic ingredients for maximum impact with minimal fuss.
Step-by-Step Directions
Creating these enchanting Meringue Ghost Cookies is surprisingly straightforward, even for beginners. I’ve broken down each step to ensure your ghostly treats turn out perfectly spooky every time.
Step 1: Preheat your oven to 100°C (200°F) and line two baking sheets with parchment paper. This low temperature is crucial for achieving that perfect crispy exterior while maintaining the chewy center.
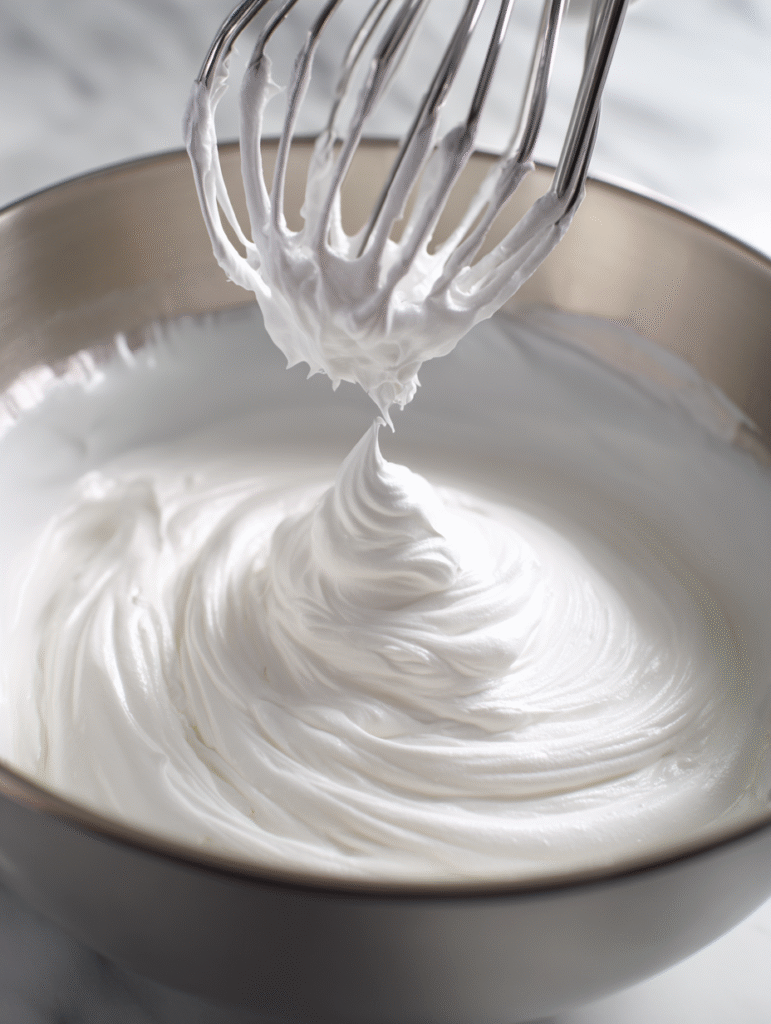
Step 2: Separate your egg whites carefully, ensuring no yolk contamination. Even a tiny bit of yolk will prevent proper whipping. Place whites in a completely clean, dry bowl.
Step 3: Whisk egg whites until soft peaks form, then gradually add sugar one tablespoon at a time. Continue beating until stiff, glossy peaks develop – this usually takes 8-10 minutes with an electric mixer.
Step 4: Gently fold in vanilla extract and vinegar using a spatula. The acid helps stabilize the meringue and creates that signature crispy texture.
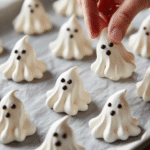
Step 5: Transfer mixture to a piping bag fitted with a round tip. Pipe ghost shapes onto prepared baking sheets, starting with a rounded base and pulling upward to create the flowing ghost silhouette.
Step 6: Use mini chocolate chips or black icing to create spooky eyes and mouths on your ghosts before baking.
Step 7: Bake for 2-3 hours until the meringues lift easily from parchment and sound hollow when tapped underneath.
Exact Timing to make Meringue Ghost Cookies
Here’s your complete timeline for perfect Meringue Ghost Cookies:
- Prep time: 15 minutes (including egg separation and setup)
- Whipping time: 10-12 minutes for perfect meringue consistency
- Piping and decorating: 20 minutes for 24 ghost cookies
- Baking time: 2.5-3 hours at low temperature
- Cooling time: 30 minutes on baking sheets
- Total time: Approximately 4 hours (mostly hands-off baking time)
Nutritional Information
These delightfully spooky treats are surprisingly light and guilt-free! Here’s the complete nutritional breakdown per serving (makes approximately 24 cookies):
| Nutrient | Per Cookie | % Daily Value |
|---|---|---|
| Calories | 28 | 1.4% |
| Total Fat | 0g | 0% |
| Saturated Fat | 0g | 0% |
| Cholesterol | 0mg | 0% |
| Sodium | 17mg | 0.7% |
| Total Carbohydrates | 7g | 2.5% |
| Dietary Fiber | 0g | 0% |
| Total Sugars | 7g | – |
| Protein | 0.5g | 1% |
According to USDA nutritional data, meringue-based cookies are naturally fat-free and relatively low in calories compared to traditional butter cookies. The primary energy source comes from simple sugars, making these treats a lighter dessert option for special occasions.
Healthier Alternatives
Transform your Meringue Ghost Cookies into even healthier treats with these smart ingredient swaps that maintain the spooky charm while boosting nutritional value:
| Original Ingredient | Healthier Alternative | Benefits |
|---|---|---|
| Regular sugar (170g) | Coconut sugar (150g) or erythritol (120g) | Lower glycemic index, fewer calories |
| Vanilla extract | Pure vanilla powder + cinnamon | No alcohol, added antioxidants |
| White vinegar | Fresh lemon juice | Vitamin C boost, natural flavor enhancement |
| Food coloring (if using) | Beetroot powder or spirulina | Natural coloring with added nutrients |
| Mini chocolate chips | Cacao nibs or dark chocolate (70%+) | Higher antioxidants, less sugar |
For those following specific dietary needs, these Meringue Ghost Cookies are already naturally gluten-free, dairy-free, and can easily become vegan by using aquafaba (chickpea liquid) instead of egg whites. Explore more healthy dessert alternatives here for additional inspiration that won’t compromise your wellness goals.
Serving Suggestions
Halloween Party Centerpiece: Arrange your Meringue Ghost Cookies on a dark slate or black serving platter for dramatic contrast. Surround them with dry ice (safely contained) for an eerily floating effect, or scatter edible glitter around the base for a magical shimmer that catches the light.
Gift Presentation: Package these delicate treats in clear cellophane bags tied with orange and black ribbons. They make perfect party favors or thoughtful neighbor gifts that showcase your homemade touch while being safe for various dietary restrictions.
Dessert Pairing: Serve alongside warm spiced apple cider or hot chocolate for a complete autumn experience. The light, airy texture of the meringues provides a delightful contrast to rich, warm beverages, creating a perfectly balanced Halloween treat spread.
Common Mistakes to Avoid
Humidity Hijacks: Never attempt making Meringue Ghost Cookies on rainy or extremely humid days. Moisture in the air prevents proper setting and can leave your ghosts sticky and chewy instead of crisp. Check your weather forecast and choose a dry day for best results.
Temperature Temptations: Resist the urge to increase oven temperature for faster baking. Higher heat will cause the outside to brown and crack while leaving the interior gummy. The low, slow method is essential for achieving that perfect melt-in-your-mouth texture that makes these cookies so special.
Impatient Piping: Don’t skip the stiff peak stage when whipping your meringue. Under-whipped mixture will spread during baking, losing those adorable ghost shapes. Your meringue should hold its form when the beaters are lifted, creating peaks that don’t collapse.
Storing Tips
Airtight is Right: Store your finished Meringue Ghost Cookies in an airtight container with parchment paper between layers. They’ll maintain their crispy texture for up to one week at room temperature. Avoid refrigeration, as this introduces unwanted moisture that will make them soggy.
Rescue Mission: If your stored meringues become slightly soft, place them back in a 100°C oven for 10-15 minutes to restore their crispiness. This quick refresh technique works wonderfully for reviving day-old cookies before serving.
Freezer Friendly: These delicate treats freeze beautifully for up to three months when properly stored in rigid containers. Thaw at room temperature for 30 minutes before serving, and they’ll taste just as fresh as the day you made them.
FAQs
Can I make Meringue Ghost Cookies without a piping bag?
Absolutely! You can spoon the meringue mixture onto parchment paper and use a knife to shape ghost forms, or transfer the mixture to a zip-lock bag with the corner snipped off. While piping bags create more precise shapes, these alternatives work perfectly for achieving that spooky ghost silhouette.
Why are my Meringue Ghost Cookies turning brown during baking?
Browning typically indicates your oven temperature is too high. Meringue Ghost Cookies require very low heat (100°C/200°F) for extended baking time. If your oven runs hot, reduce the temperature further and consider using an oven thermometer for accuracy.
How do I know when my Meringue Ghost Cookies are completely done?
Properly baked Meringue Ghost Cookies should lift easily from the parchment paper and sound hollow when gently tapped on the bottom. They should feel completely dry to the touch with no soft or sticky areas remaining.
Can I add food coloring to my Meringue Ghost Cookies for different effects?
Yes, but use gel or powder food coloring rather than liquid varieties, which can affect the meringue’s stability. Add coloring during the final stages of whipping for even distribution. Remember that a little goes a long way with these concentrated colorings.
Meringue Ghost Cookies
- Total Time: 4 hours
- Yield: 24 ghost cookies 1x
Description
These Spooky Meringue Ghost Cookies are light, airy, and hauntingly cute Halloween treats that melt in your mouth. Made with just four ingredients, they’re easy, fun, and naturally gluten-free. Perfect for recipes quick, recipes dessert, and recipes for kids.
Ingredients
- 3 medium egg whites
- 170g (3/4 cup) sugar
- 1 teaspoon vanilla extract or 1 pack vanilla sugar
- 1/2 teaspoon white vinegar or a squeeze of lemon juice
- Mini chocolate chips or black icing for eyes
Instructions
- Preheat oven to 200°F (100°C) and line two baking sheets with parchment paper.
- Separate egg whites carefully into a clean, dry bowl, ensuring no yolk gets in.
- Whip egg whites with an electric mixer until soft peaks form.
- Gradually add sugar one tablespoon at a time, beating until stiff, glossy peaks form (about 8–10 minutes).
- Fold in vanilla and vinegar gently using a spatula.
- Transfer meringue to a piping bag fitted with a round tip. Pipe ghost shapes by starting with a round base and pulling up to form a point.
- Add mini chocolate chips or black icing dots for eyes and mouths.
- Bake for 2.5 to 3 hours until the meringues lift easily from parchment and sound hollow when tapped underneath.
- Cool completely on baking sheets for 30 minutes before storing.
Notes
These meringue ghost cookies are perfect for Halloween parties or festive dessert platters. Store in an airtight container at room temperature for up to one week. Avoid humidity to keep them crisp.
- Prep Time: 15 minutes
- Cook Time: 3 hours
- Category: Dessert
- Method: Baking
- Cuisine: American
Nutrition
- Serving Size: 1 cookie
- Calories: 35
- Sugar: 7g
- Sodium: 5mg
- Fat: 0g
- Saturated Fat: 0g
- Unsaturated Fat: 0g
- Trans Fat: 0g
- Carbohydrates: 8g
- Fiber: 0g
- Protein: 1g
- Cholesterol: 0mg
Keywords: Halloween cookies, meringue ghosts, recipes quick, recipes dessert, recipes for kids